A user can be added in Pellustro by the Admin.
To add user(s):
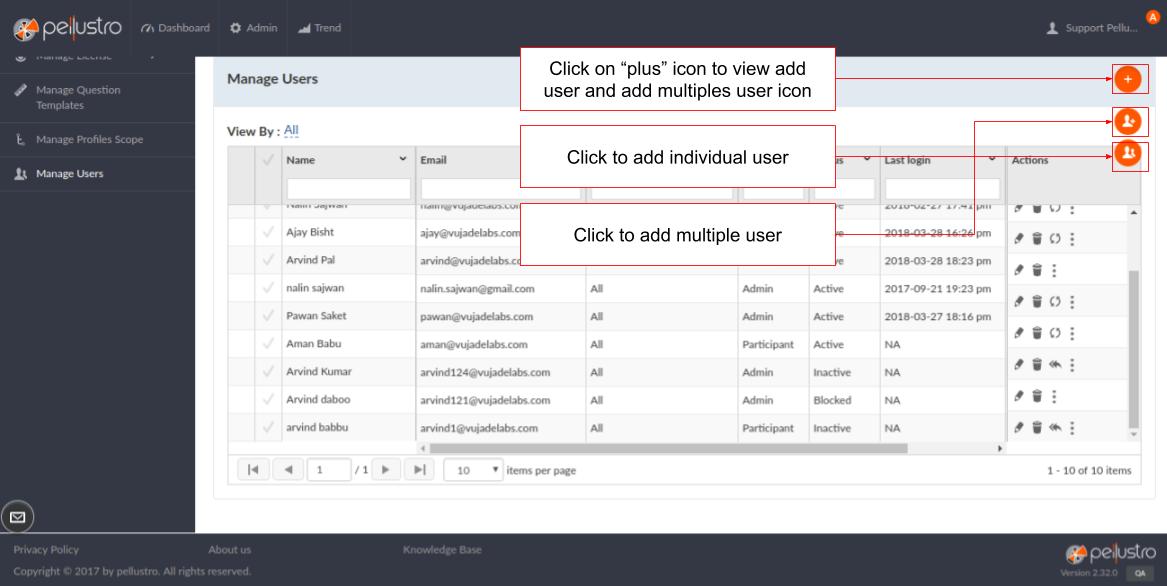
1. Locate Admin section in the top panel. In the admin section click on Manage User. By clicking on manage user, all the user and their details appear.
2. Now at the right side, you'll see an Add icon. By clicking on the icon, two icons appear one for adding individual user and the other for adding multiple users.

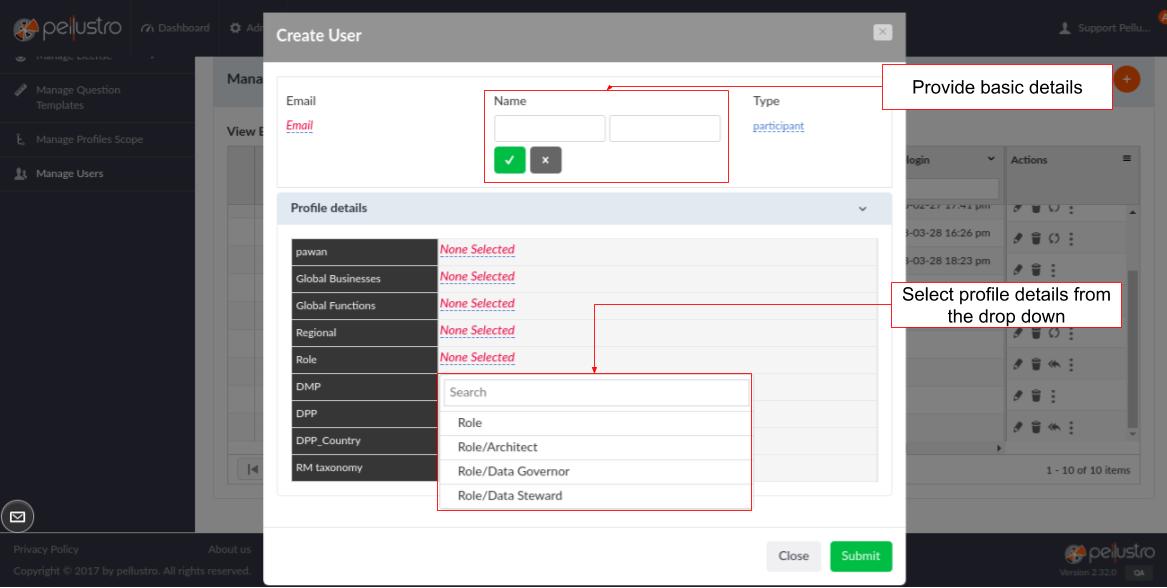
- Add Individual User: By clicking on the add individual user icon the Admin can add any individual user by providing basic details (email, name and user type) and profile details (location, role, function, and business line). Click Submit once done.

- Add Multiple Users: Multiple users can be uploaded either through template file or by providing the details in the given table.
- Bulk user upload through template file
To upload users in bulk through template file, first, download and fill the template file and then upload it once done. Click Next.

- Adding user details in the given table
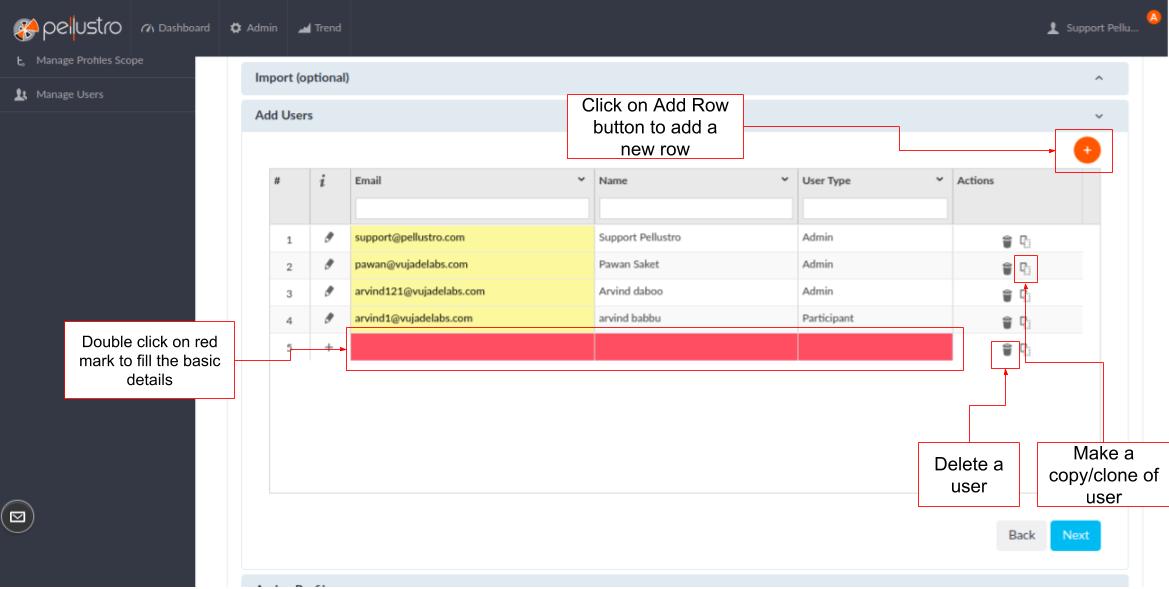
To add users in bulk through the given table, first, click on the add icon given at the right side of the Add Users panel. Now, provide the Email id, Name and User type of the users in the red box shown in the below screenshot.

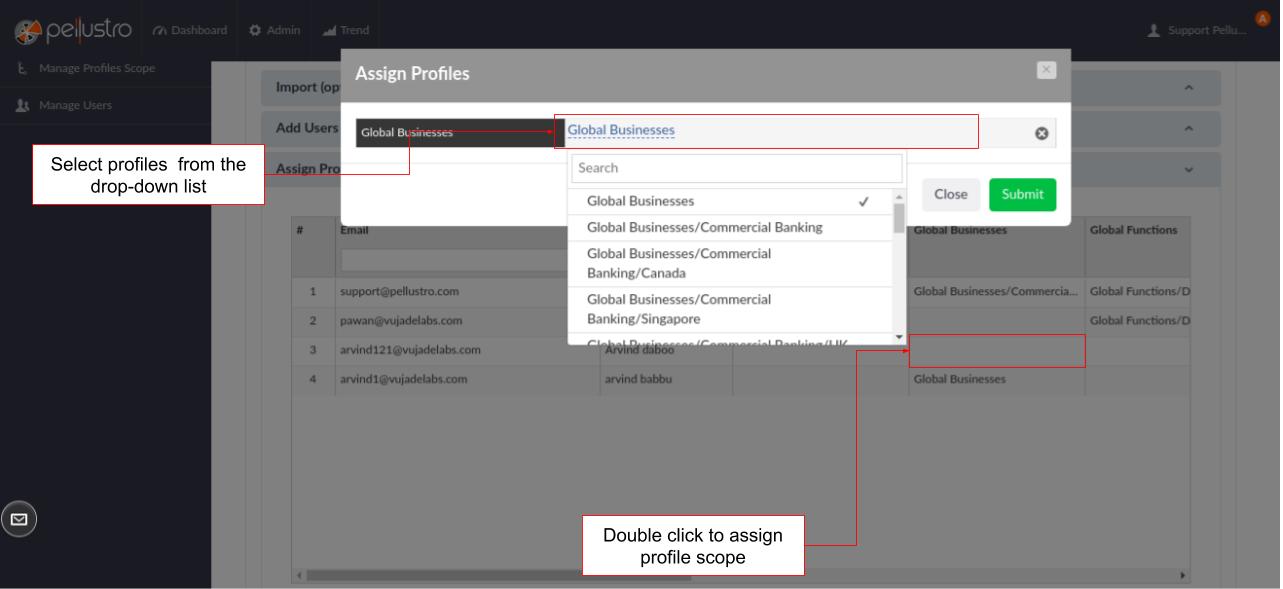
Now, assign profiles (location and role) to the users in the Assign Profiles panel. Once done click Next.

Now in the Confirm Panel, details about the number of users about to be added are provided. Click on Confirm and Save button to add the desired users.
Related Articles
For more information on Pellustro and its features, go to https://pellustro.freshdesk.com/solution/categories
Was this article helpful?
That’s Great!
Thank you for your feedback
Sorry! We couldn't be helpful
Thank you for your feedback
Feedback sent
We appreciate your effort and will try to fix the article